BookApp Seller App
BookApp Vendor is a production-ready, fully functional and API-integrated vendor management application built with Flutter. This is the service provider/vendor companion app for the BookApp ecosystem. It ships with comprehensive business management features, clean architecture, and integrated tools (auth, withdrawals, analytics, staff management, multi-language, dark mode) so vendors can manage their service business efficiently on both Android and iOS.
What you get out of the box
- Complete vendor dashboard: analytics, revenue tracking, appointment management, and business insights.
- Service management: Add, edit, and promote services with multi-language support, rich media, and pricing controls.
- Staff & schedule management: Manage team members, assign services, set working hours, holidays, and time slots.
- Financial tools: Withdrawal requests, transaction history, balance tracking with multiple payment gateways.
- Appointment handling: View, accept, reject appointments with detailed customer information and status tracking.
- Business tools: Package/plan management, support tickets, email communications, and plugin integrations.
- Modern features: Dark mode, RTL support, multi-language, responsive layouts, and offline handling.
Architecture at a glance (feature-first)
lib/app: application layer and cross-cutting concernslocalizations/for i18n support with dynamic language loadingproviders/shared/global state (Theme, Auth, Config, Currency, Language, Translation)- Core app files:
app_colors.dart,app_theme_data.dart,assets_path.dart,app_constants.dart,app_text_styles.dart,urls.dart
lib/features: domain modules with clear boundariesauth/: vendor login, signup, splash screendashboard/: analytics, revenue charts, appointment stats, business overviewappointments/: manage bookings (pending, accepted, rejected), appointment detailsservices/: add/edit services, promote services, service listings with multi-language contentstaff/: staff management, time slots, holidays, service assignments, permissionswithdrawal/: balance tracking, withdrawal requests, transaction historyedit_profile/: vendor profile editing with multi-language supportschedule/: vendor working days and time slots configurationbuy_plan/: subscription plans and package managementsupport_tickets/: ticket system for vendor support with conversationstransactions/: complete transaction history and analyticspackage_limits/: view current plan limits and usageplugins/: plugin configurationsemail/: email communication toolschange_password/: secure password managementservice_inquiry/: handle service inquiriesnav_app_bar/: navigation and app bar componentscommon/: reusable UI components, widgets, and utilities
lib/network: API client and service layerapi_client.dart: HTTP client with interceptors, error handling, token managementservices/: domain-specific API services (auth, dashboard, appointments, services, etc.)
Key integrations
- State management with
providerfor reactive state across all modules. - Networking with
dio, with comprehensive error handling and logging viaapp_logger. - Multi-language support via dynamic API-driven translations with RTL support for Arabic and other RTL languages.
- Dark mode with theme switching between light and dark themes throughout the app.
- Multiple withdrawal payment gateways support for vendor payouts.
- Rich text editing with
flutter_quillfor service descriptions. - Maps & location using
google_maps_flutterandgeolocatorfor service location management. - Image handling with
image_picker,image_cropper, andfile_pickerfor media uploads. - Calendar integration with
table_calendarfor scheduling and availability management.
Branding and theming
- Primary and secondary theme colors, as well as app logos, are fetched from the Admin Panel at runtime.
- Dark mode support with automatic theme switching based on user preference.
- Supporting colors and accent tones can be customized in
app_colors.dartandapp_theme_data.dart. - Custom fonts and text styles defined in
app_text_styles.dart.
The result is a maintainable, scalable codebase that adheres to Flutter best practices and promotes reuse. You can customize typography, colors, layouts, assets, and module-level behavior without fighting the structure—making it faster to ship features and iterate.
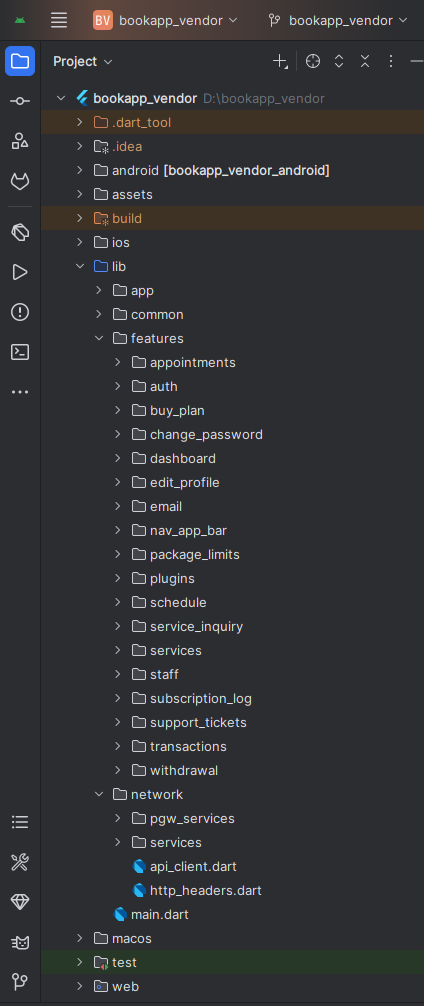
Folder Structure
All you need to follow the lib(Library) Folder for any logical and UI changes in this project.
lib
├── app
│   ├── localizations
│   ├── providers
│   │   ├── app_config_provider.dart
│   │   ├── auth_provider.dart
│   │   ├── currency_provider.dart
│   │   ├── language_provider.dart
│   │   ├── theme_provider.dart
│   │   └── translation_provider.dart
│   ├── app.dart
│   ├── app_colors.dart
│   ├── app_constants.dart
│   ├── app_text_styles.dart
│   ├── app_theme_data.dart
│   ├── assets_path.dart
│   └── urls.dart
├── features
│   ├── appointments
│   │   ├── data/models
│   │   ├── providers
│   │   └── ui/screens
│   ├── auth
│   │   ├── providers
│   │   └── ui/screens
│   ├── buy_plan
│   │   ├── data/models
│   │   ├── providers
│   │   └── ui/screens
│   ├── change_password
│   │   └── ui/screens
│   ├── dashboard
│   │   ├── data/models
│   │   ├── providers
│   │   └── ui/screens
│   ├── edit_profile
│   │   ├── data/models
│   │   ├── providers
│   │   └── ui/screens & widgets
│   ├── email
│   │   └── ui/screens
│   ├── nav_app_bar
│   │   └── ui/screens
│   ├── package_limits
│   │   ├── data/models
│   │   ├── providers
│   │   └── ui/screens
│   ├── plugins
│   │   ├── data/models
│   │   ├── providers
│   │   └── ui/screens
│   ├── schedule
│   │   ├── data/models
│   │   ├── providers
│   │   └── ui/screens
│   ├── services
│   │   ├── data/models
│   │   ├── providers
│   │   └── ui/screens & widgets
│   ├── service_inquiry
│   │   ├── data/models
│   │   ├── providers
│   │   └── ui/screens
│   ├── staff
│   │   ├── data/models
│   │   ├── providers
│   │   └── ui/screens & widgets
│   ├── subscription_log
│   │   ├── data/models
│   │   ├── providers
│   │   └── ui/screens
│   ├── support_tickets
│   │   ├── data/models
│   │   ├── providers
│   │   └── ui/screens
│   ├── transactions
│   │   ├── data/models
│   │   ├── providers
│   │   └── ui/screens
│   └── withdrawal
│       ├── data/models
│       ├── providers
│       └── ui/screens
├── common
│   ├── ui/widgets
│   ├── ui/screens
│   └── utils
└── network
    ├── api_client.dart
    └── services
        ├── appointments_service.dart
        ├── auth_service.dart
        ├── dashboard_service.dart
        ├── services_service.dart
        ├── staff_service.dart
        ├── withdrawal_service.dart
        └── ...other services
Screens
Vendor App Screens (43 Total):
Authentication (3 screens)
1. Splash Screen
2. Vendor Login Screen
3. Vendor Signup Screen
Dashboard (1 screen)
4. Vendor Dashboard Screen (analytics, charts, business overview)
Appointments (6 screens)
5. Vendor Appointments Screen
6. Pending Appointments Screen
7. Accepted Appointments Screen
8. Rejected Appointments Screen
9. Appointments Settings Screen
10. Vendor Appointment Details Screen
Services (4 screens)
11. Vendor Services Screen (list of all services)
12. Add/Edit Services Screen (multi-language, rich text editor)
13. Service Promotion Screen
14. Service Success Screen
Staff Management (6 screens)
15. Staff Screen (staff list)
16. Add Staff Screen
17. Service Assignment Screen (assign services to staff)
18. Staff Time Slots Screen
19. Staff Holiday Screen
20. Service Days Screen (staff working days)
Schedule Management (3 screens)
21. Days Screen (vendor working days)
22. Vendor Holidays Screen
23. Vendor Time Slots Screen
Financial (3 screens)
24. My Balance Screen
25. Request Withdrawal Screen
26. Transactions Screen
Profile & Settings (2 screens)
27. Vendor Edit Profile Screen
28. Change Vendor Password Screen
Support (3 screens)
29. All Tickets Screen
30. Add Ticket Screen
31. Conversations Screen (ticket chat)
Subscription & Plans (5 screens)
32. Buy Plan Screen
33. Plan Payment Screen
34. Payment Success Screen
35. Subscription Log Screen
36. Package Limits Screen
Additional Features (7 screens)
37. Plugins Screen
38. Service Inquiry Screen (customer inquiries)
39. Checkout WebView Screen (payment gateways)
40. Navigation App Bar (drawer/menu)
41. Email Verification Screen
42. Gallery Section (service images)
43. Image Picking & Editing Screens
Requirements
Download and install Any one from these IDE(Android studio, Vs Code) on your computer.
- Source Android Studio: https://developer.android.com/studio
- Source Android Studio: https://code.visualstudio.com/download
Setup Flutter and Dart SDK in your computer if you want to modify the source code
- Source Android Studio: https://docs.flutter.dev/get-started/install
Must installed Flutter and dart plugin on your IDE
Install Flutter on Windows
Install Flutter on Mac
Installation
After downloading file from CodeCanyon you will get a zip file. Extracting the zip file you will get Documentation Folder, website-api.zip and installable.zip included in there:
- Unzip the installable.zip and open it in your IDE.
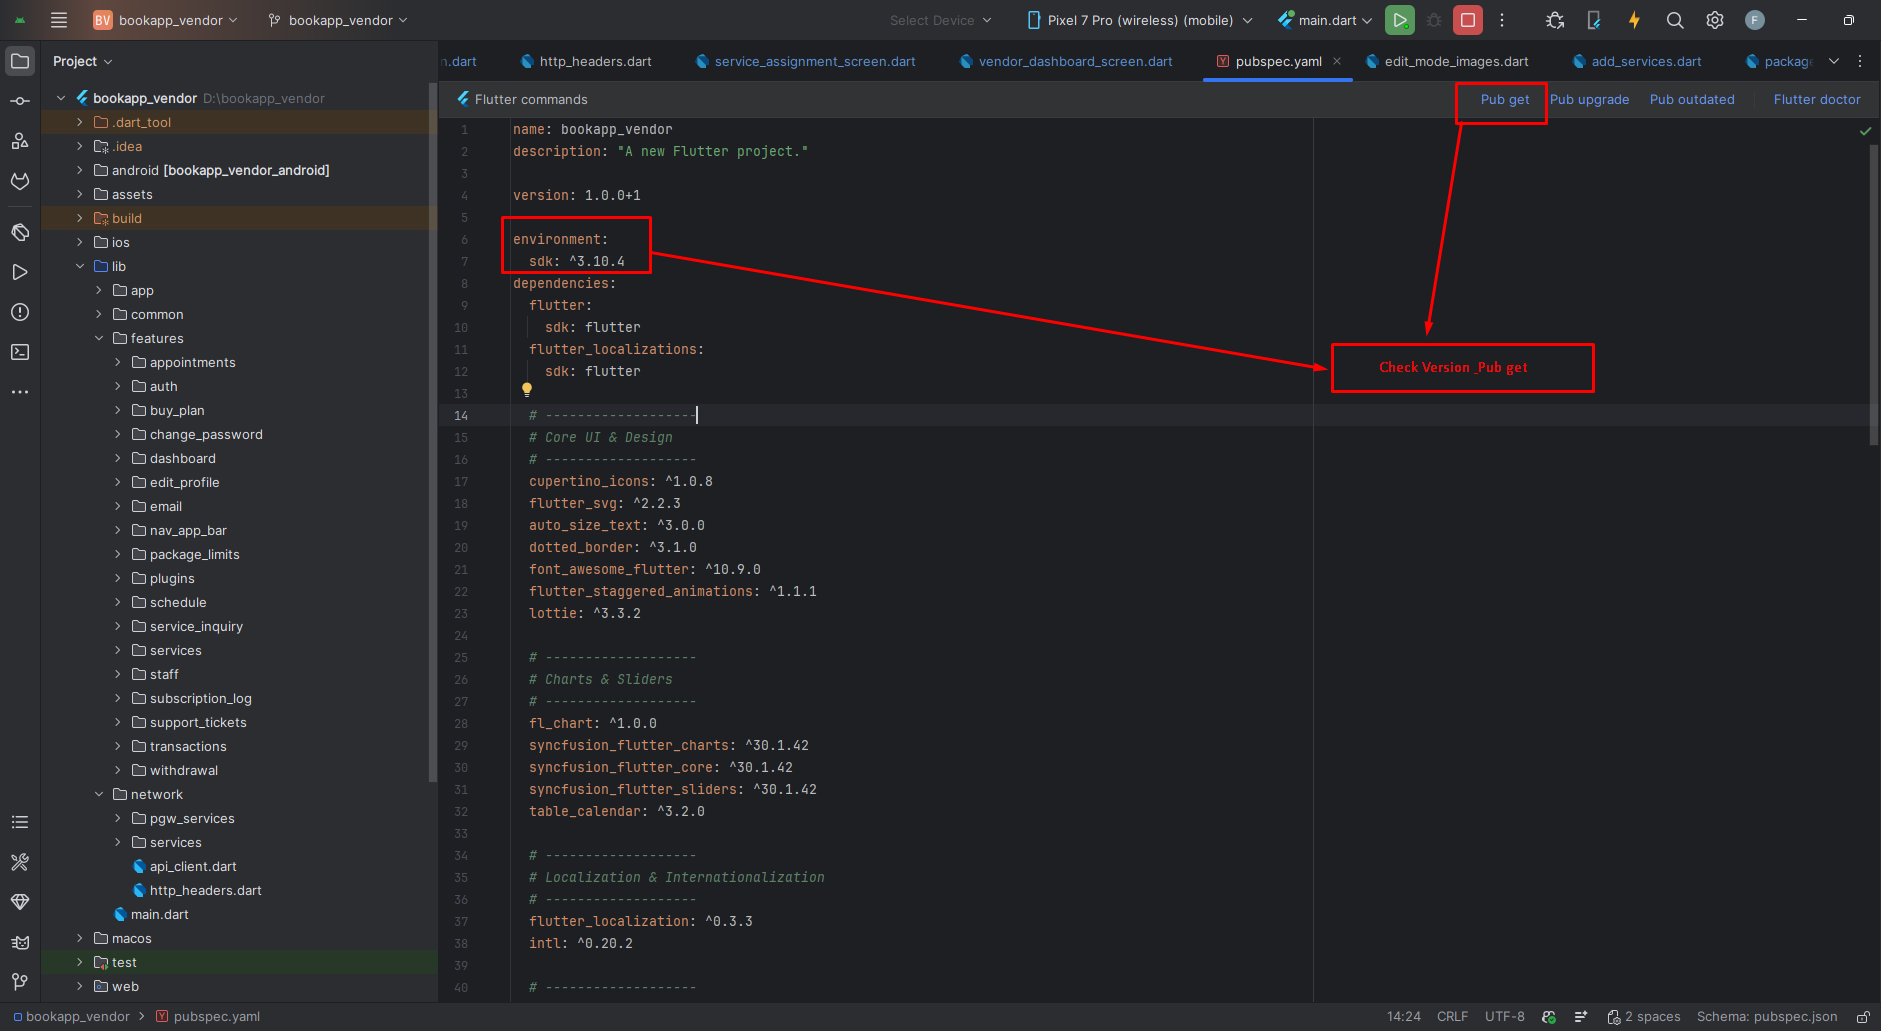
- On your IDE find for pubspecs.yaml file then click on pub get on top right side your IDE.
- Please make sure you are using Flutter version minimum 3.30.0
- Open an emulator or connect a real device and then click on Run Button for compile the project.
Flutter Packages
Core UI & Design
📁 cupertino_icons >> iOS-style icon set for Cupertino widgets
📁 flutter_svg >> Render SVG assets in Flutter
📁 table_calendar >> Powerful and customizable calendar widget for scheduling
📁 flutter_staggered_animations >> Easy staggered list/grid animations
Localization & Text
📁 flutter_localizations >> Built-in Flutter localizations
📁 intl >> Date/number formatting and i18n utilities
📁 flutter_quill >> Rich text editor for service descriptions
📁 vsc_quill_delta_to_html >> Convert Quill delta to HTML
📁 html >> HTML parsing and manipulation
State Management
📁 provider >> Officially recommended state management
Networking & Data
📁 dio >> Powerful HTTP client with interceptors
📁 shared_preferences >> Persistent key-value storage
📁 connectivity_plus >> Network connectivity status
📁 logger >> Pretty logging for debugging
📁 url_launcher >> Launch URLs in external applications
File & Image Handling
📁 image_picker >> Capture/select images from camera or gallery
📁 image_cropper >> Crop and edit images
📁 file_picker >> Pick files from device storage
📁 cached_network_image >> Network images with caching
Maps & Location
📁 google_maps_flutter >> Google Maps integration
📁 geolocator >> Device geolocation (GPS)
📁 geocoding >> Convert coordinates to addresses
Payments & Withdrawals
📁 flutter_stripe >> Stripe payment integration
📁 razorpay_flutter >> Razorpay payment integration
📁 webview_flutter >> In-app WebView for payment gateways
⚠️ Note: This app does NOT use Firebase or push notifications. All notification-related packages have been removed.
Charts & Analytics
📁 fl_chart >> Beautiful and customizable charts
Utilities
📁 fluttertoast >> Toast notifications
📁 package_info_plus >> Get app package information
📁 shimmer >> Shimmer loading placeholders
📁 percent_indicator >> Progress indicators
📁 flutter_keyboard_visibility_temp_fork >> Keyboard visibility detection
📁 permission_handler >> Runtime permission handling
📁 flutter_native_splash >> Generate native splash screens
Mobile App Setting
Configure your mobile app settings through the admin panel. This section covers all essential configurations including home page content, general settings, payment gateways, and plugin integrations.
Payment Gateways
Configure multiple payment gateway integrations to accept payments in your app. Each gateway can be enabled/disabled independently and configured with test or live credentials.
💡 How to Configure Payment Gateways:
- Navigate to Mobile App Setting → Payment Gateways in your admin panel
- Select the payment gateway you want to configure
- Toggle the Status switch to enable/disable the gateway
- Enable Test Mode/Sandbox for testing before going live
- Enter your API credentials (obtain these from your payment gateway dashboard)
- Click Save to apply the changes
Note: You can enable multiple payment gateways. Users will be able to choose their preferred payment method during checkout.
1. PayPal
Accept payments via PayPal - one of the most widely used payment platforms worldwide.
| PayPal Status | Toggle ON to enable PayPal payments in your app |
| PayPal Test Mode | Enable to use PayPal sandbox for testing (recommended during development) |
| PayPal Client ID | Enter your PayPal application Client ID from PayPal Developer Dashboard |
| PayPal Client Secret | Enter your PayPal application Client Secret |
2. Toyyibpay
Malaysian payment gateway for local payment methods.
| Status | Toggle ON to enable Toyyibpay |
| Test Mode | Enable for sandbox testing |
| Secret Key | Enter your Toyyibpay secret key from your Toyyibpay account |
| Category Code | Enter your Toyyibpay category code |
3. Stripe
Popular global payment processor supporting credit/debit cards and various payment methods.
| Stripe Status | Toggle ON to enable Stripe payments |
| Stripe Key | Enter your Stripe Publishable Key from Stripe Dashboard |
| Stripe Secret | Enter your Stripe Secret Key (keep this confidential) |
4. Flutterwave
African payment gateway supporting multiple currencies and payment methods.
| Flutterwave Status | Toggle ON to enable Flutterwave payments |
| Flutterwave Public Key | Enter your Flutterwave Public Key from your dashboard |
| Flutterwave Secret Key | Enter your Flutterwave Secret Key |
5. Midtrans
Indonesian payment gateway with support for local payment methods.
| Status | Toggle ON to enable Midtrans payments |
| Test Mode | Enable for sandbox testing |
| Server Key | Enter your Midtrans Server Key from dashboard |
| ⚠️ Important: Configure webhook URLs in your Midtrans Dashboard settings to receive payment notifications. | |
6. My-Fatoorah
Middle Eastern payment gateway supporting Kuwait, Saudi Arabia, and other MENA countries.
| MyFatoorah Status | Toggle ON to enable MyFatoorah payments |
| Sandbox Status | Enable for testing before going live |
| Token | Enter your MyFatoorah API Token |
7. Authorize.Net
US-based payment gateway for processing credit card transactions.
| Authorize.Net Status | Toggle ON to enable Authorize.Net payments |
| Test Mode | Enable for sandbox testing |
| API Login ID | Enter your Authorize.Net API Login ID |
| Transaction Key | Enter your Transaction Key |
| Public Client Key | Enter your Public Client Key |
8. PhonePe
Indian digital payment platform with UPI, cards, and wallet support.
| Status | Toggle ON to enable PhonePe payments |
| Sandbox Status | Enable for testing in sandbox environment |
| Client Id | Enter your PhonePe Client ID |
| Client Secret Key | Enter your PhonePe Client Secret Key |
| Salt Index | Enter your PhonePe Salt Index for transaction security |
9. Monnify
Nigerian payment platform for bank transfers and card payments.
| Status | Toggle ON to enable Monnify payments |
| Sandbox Status | Enable for testing |
| Api Key | Enter your Monnify API Key |
| Secret Key | Enter your Monnify Secret Key |
| Wallet Account Number | Enter your Monnify Wallet/Contract Account Number |
10. Paystack
Nigerian payment gateway popular across Africa for online payments.
| Paystack Status | Toggle ON to enable Paystack payments |
| Paystack Secret Key | Enter your Paystack Secret Key from your dashboard |
11. NowPayments
Cryptocurrency payment gateway accepting Bitcoin, Ethereum, and other cryptocurrencies.
| Status | Toggle ON to enable cryptocurrency payments via NowPayments |
| Api Key | Enter your NowPayments API Key |
12. Mollie
European payment service provider supporting various payment methods including iDEAL and SEPA.
| Status | Toggle ON to enable Mollie payments |
| API Key | Enter your Mollie API Key from your dashboard |
13. Xendit
Southeast Asian payment gateway supporting Indonesia, Philippines, and more.
| Status | Toggle ON to enable Xendit payments |
| Secret Key | Enter your Xendit Secret Key |
14. MercadoPago
Latin American payment platform widely used in Argentina, Brazil, Mexico, and more.
| MercadoPago Status | Toggle ON to enable MercadoPago payments |
| Test Mode | Enable for testing before going live |
| MercadoPago Token | Enter your MercadoPago Access Token |
15. Razorpay
Indian payment gateway supporting UPI, cards, net banking, and wallets.
| Razorpay Status | Toggle ON to enable Razorpay payments |
| Razorpay Key | Enter your Razorpay Key ID from Razorpay Dashboard |
| Razorpay Secret | Enter your Razorpay Secret Key |
Setup Application
Change App Name
Android
- Open
<project>/android/app/src/main/AndroidManifest.xml - Update the
android:labelvalue inside the<application>tag:
<application
    android:label="My App"
    android:icon="@mipmap/ic_launcher">

</application>
iOS
- Open
<project>/ios/Runner/Info.plist - Change
CFBundleName:
<key>CFBundleName</key>
<string>My App</string>
Optional: Some setups also use CFBundleDisplayName for the home screen name.
Reinstall after rename
- Uninstall the previously installed app from the device/emulator, then rebuild and run.
- Optional (Android): uninstall via package id:
Change App Launcher Icons (flutter_launcher_icons:)
- Update the
flutter_launcher_iconsconfig in yourpubspec.yaml(package already added):
flutter_launcher_icons:
  android: true
  ios: true
  image_path: "assets/icons/icon.png"
  adaptive_icon_foreground: "assets/icons/icon.png"
  adaptive_icon_background: "assets/icons/background.png"
- Place your icons at:
assets/icons/icon.png(square, 1024x1024 recommended)assets/icons/background.png(solid/simple background for Android adaptive icon)
- Generate icons:
- Rebuild the app. If icons don’t update, clear build caches and run again.
Notes
- Android uses adaptive icons; prefer a simple, solid background and a centered foreground with padding.
- iOS uses a single raster icon automatically generated from
image_path(adaptive fields are ignored on iOS). - The runtime splash logo is loaded from the Admin Panel via API; launcher icons remain static and are generated with this package.
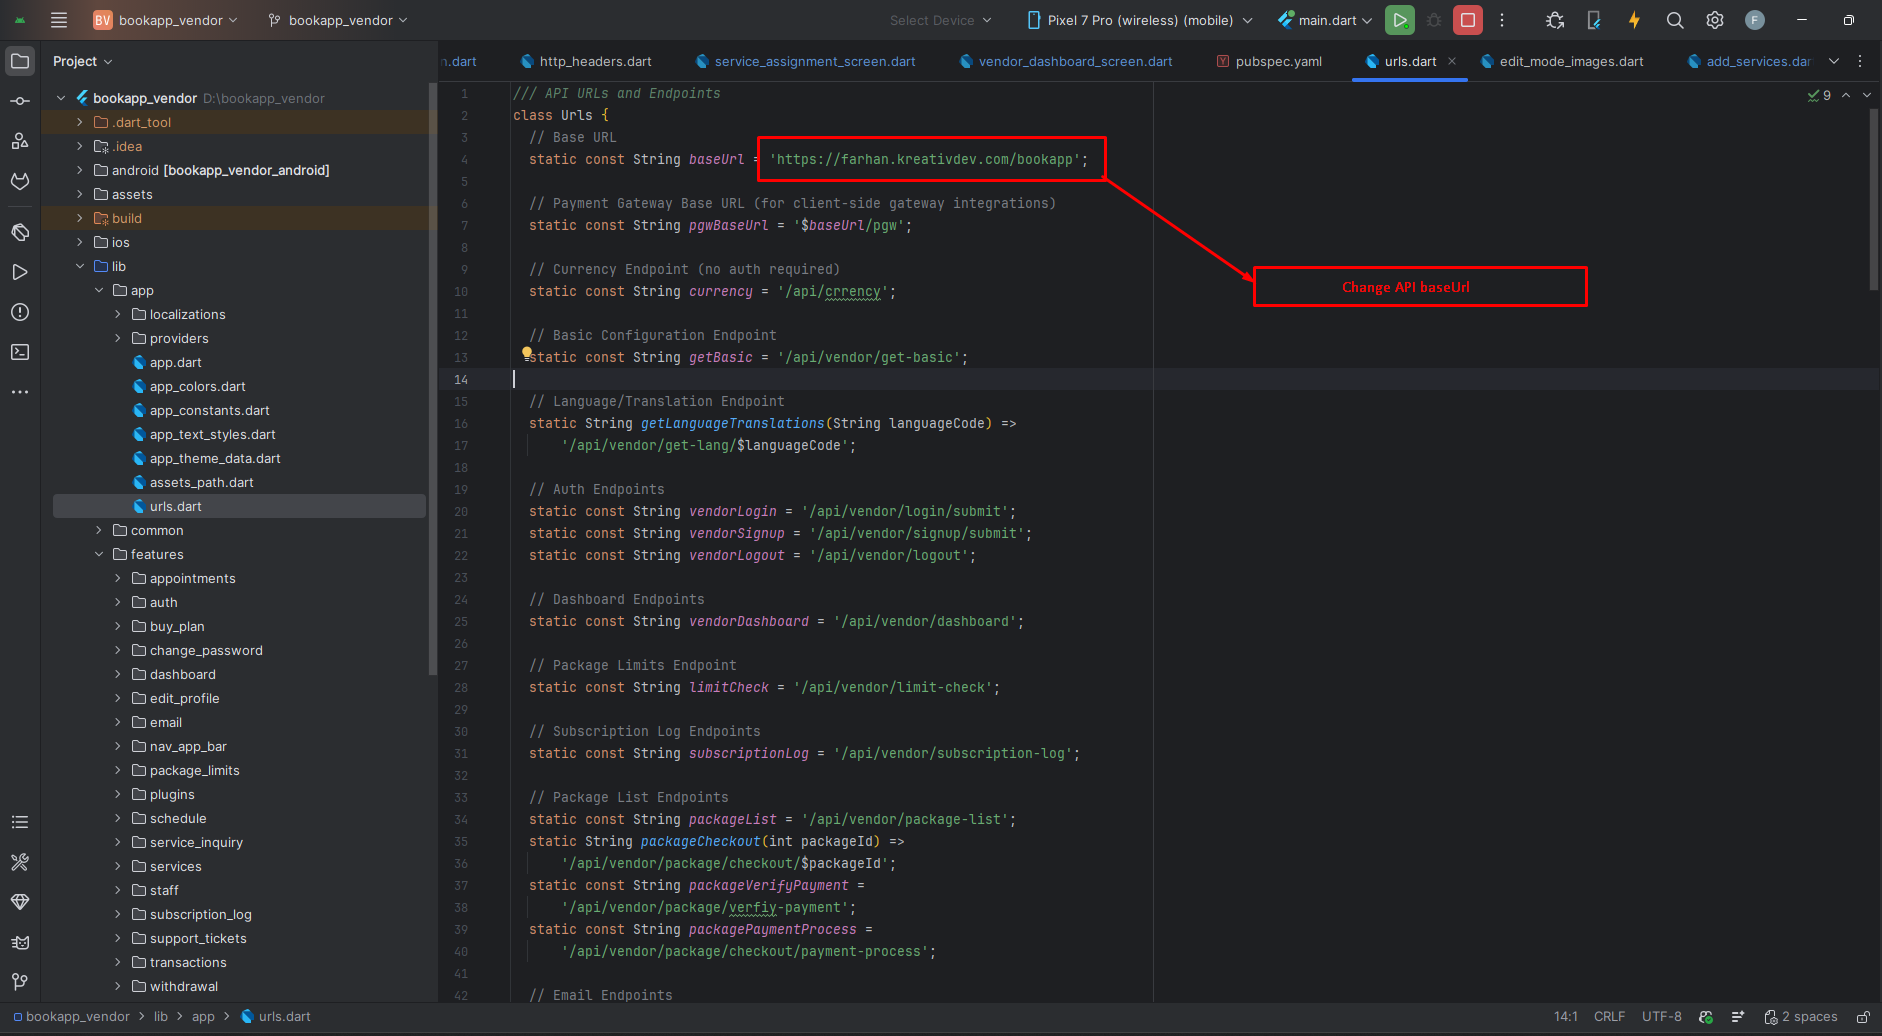
Change API URL
- Open
lib/app/urls.dart - Update the base URL constant to your server URL (no trailing slash):
class Urls {
  // Base API URL
  static const String _baseUrl = 'https://your-domain.com/bookapp'; // ← no trailing slash
  static const String _apiBaseUrl = '$_baseUrl/api';

  // ...other endpoints
}
- Do not add a trailing
/to_baseUrl(it’s appended in_apiBaseUrl). - If your API path is different (e.g.,
/v1), adjust_apiBaseUrlaccordingly. - After changing the URL, restart the app. If you still see old data, clear app storage or log out to refresh tokens.
App Logo & Branding
- Primary App Logos & Splash: Managed from the Admin Panel (recommended). The app fetches and displays the latest logo variants automatically, including the Splash Screen logo shown at runtime. No code change is required.
- Supporting assets (optional): You may override fallback and auxiliary images in code if
needed:
- Asset references: update
lib/app/assets_path.dart(classAssetsPath). Common entries you can swap:- App Branding:
topBgPng,opsPng,errPng - Common Icons:,
markerSvg,backIconSvg,cancelSvg,filterSvg,reservationsSvg,orderHistorySvg,languageSvg,clockSvg,walletSvg - User & Profile:
userEdit,userPlaceholderPng,defaultVendor - Dashboard / Menu:
wishListSvg - Analytics / Stats:
totalAppointmentSvg,bgCardPng - Payment Gateway Logos: constants under
assets/pgwvia_pgwBase(e.g.,anet.svg, others)
- App Branding:
- Static files (optional):
assets/images/logo.svg,assets/images/logo.png,assets/images/small-logo.png,assets/images/fav.png. - Splash handling:
- Runtime Splash Screen: The logo is fetched from the Admin Panel via API and displayed dynamically.
- Native splash (optional): keep minimal (e.g., solid background color) using
flutter_native_splash. Avoid embedding a fixed logo since branding is loaded in-app. - Launcher icon: still static, configure via
flutter_launcher_icons.
- Asset references: update
Tip: After updating logos in the Admin Panel, restart the app to pull the latest branding. If the network
is unavailable, the app will show local fallbacks from AssetsPath. After changing local assets,
clear caches or run a clean build.
Theme Colors
- Primary & Secondary: Manage these from the Admin Panel settings (recommended). No code change is required.
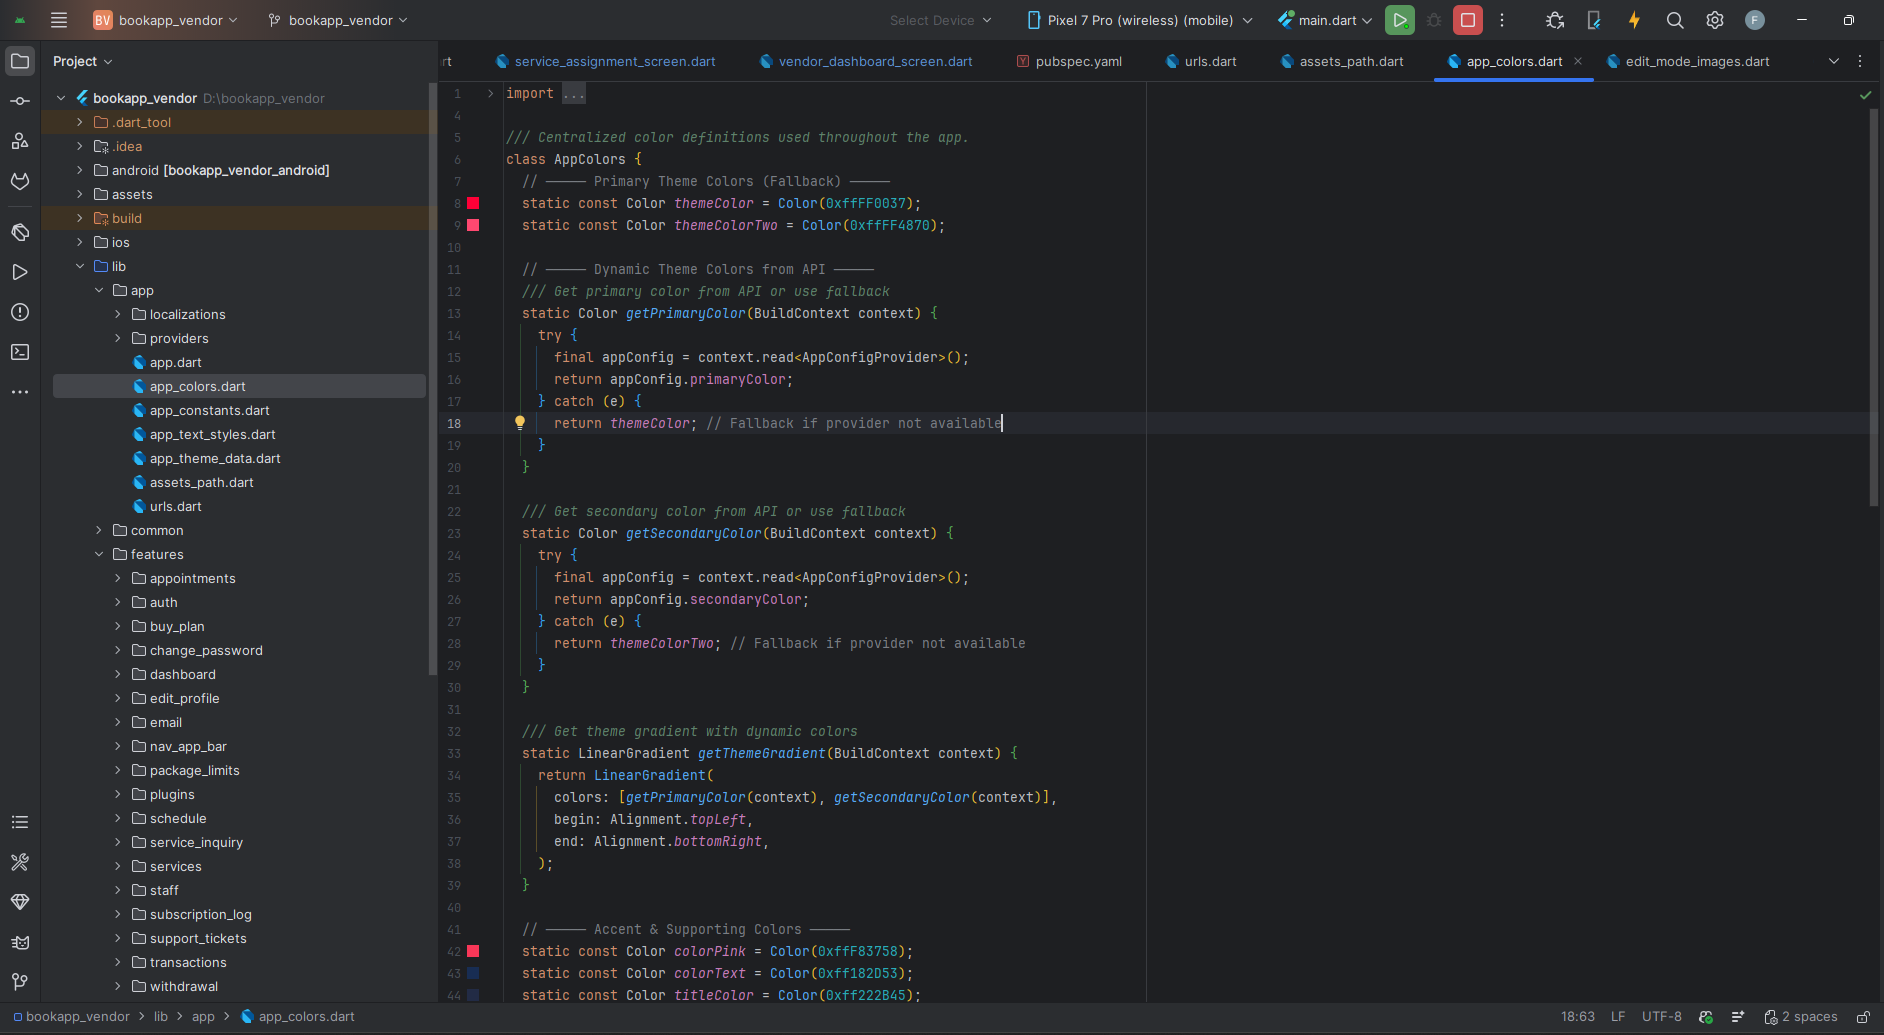
- Accent & Supporting colors (optional): You can manually override accent/supporting
tones in code if needed. Update
lib/app/app_colors.dart(and, if applicable,lib/app/app_theme_data.dart) for items like success/warning/info colors, chip backgrounds, and rating stars.
Tip: After changing colors from the Admin Panel, restart the app to fetch the latest theme configuration.
- Source Android Studio: https://pub.dev/packages/rename_app
- Source Android Studio: https://pub.dev/packages/flutter_launcher_icons
- Source Android Studio: https://pub.dev/packages/change_app_package_name
Build & Run App
Run the Application:
- In the target selector, select an Android device for running the app. If none are listed as available, select Tools> Android > AVD Manager and create one there. For details, see Managing AVDs.
- If you don't use Android Studio, Vs Code or IntelliJ you can use the command line to run your application using the following command:
Build Release & Publish App
1. Build Release Apk or other file type as your need.
After making all your changes and customizations, save the project. Then open the console, navigate to your project folder, and execute the following command:
⚡ For Play Store deployments, it’s recommended to use App Bundles or split APKs to reduce the final APK size.
Build and Install App:
• Generate App Bundle (recommended):
• Split APKs per ABI:
Signing the App (required for Google Play):
Before uploading, you must sign your app. Generate a signing key by running:
Create a key.properties file inside android/ folder with the following content:
keyPassword = password from previous step
keyAlias = key
storeFile = location of the keystore file (e.g. /Users/username/key.jks)
Then update android/app/build.gradle with:
def keystoreProperties = new Properties()
keystoreProperties.load(new FileInputStream(keystorePropertiesFile))
signingConfigs {
release {
keyAlias keystoreProperties['keyAlias']
keyPassword keystoreProperties['keyPassword']
storeFile file(keystoreProperties['storeFile'])
storePassword keystoreProperties['storePassword']
}
}
buildTypes {
release {
signingConfig signingConfigs.release
}
}
2. Android (Play Store)
Follow the official guidelines to publish your signed app or app bundle to the Google Play Store:
https://flutter.dev/docs/deployment/android3. iOS (App Store)
Follow the official guidelines to publish your app to the Apple App Store:
https://flutter.dev/docs/deployment/iosRun flutter build apk --release for Android.
Run flutter build ios --release for iOS.
Follow Flutter docs for publishing to Play Store / App Store.
Support
📩 For support, customization, or queries, contact us via email.